Equipment Sales
Maintenance Of Your Scuba Equipment
Proper maintenance of scuba equipment is important! Not only is it safer to use, but it lasts longer and maintains its value. Most diving gear is made of rubber, plastic and metal parts that are subject to oxidation and decay. Salt, dust, dirt, heat, ultraviolet light, ozone and fumes can all be harmful to scuba equipment, so divers should use good judgment in protecting their gear from these substances and cleaning out the equipment after every use. Please take a moment to read thru the maintenance procedures we suggest for keeping your scuba equipment in top shape and keeping you safe when you need it most!
Regulator
Predive
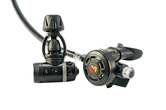
1. Connect your regulator to a tank when preparing your gear for a dive trip. Take a few breaths from the regulator, a few breaths from the octopus and check the SPG for an accurate reading.
2. Visually inspect all regulator hoses to ensure there are no cracks, make sure there are no holes or tears in the mouthpieces and check the metal fittings for corrosion.
3. If you use hose protectors, slide them away from the first stage to check beneath them. At the same time, look for corrosion on the metal first stage. Cracks in the hoses or obvious corrosion on any of the regulator's components require professional service from a qualified technician.
4. Next, disconnect the regulator from the tank, replace the dust cover, inhale on each regulator forcefully and hold a vacuum. Each regulator should let in either a very tiny trickle of air or no air at all.
5. Check each second-stage housing for cracks.
Postdive
1. When rinsing your regulator, make sure the purge valves on the second stages don't get depressed and the first stage dust cover is firmly in place.
2. After dunking the entire octopus, rinse your second stages by running warm water through the regulator mouthpiece and out the exhaust diaphragm.
3. Rinse the fitting that connects to your low-pressure inflator by working the slip coupling back and forth while holding it under warm running water.
BCDs
Pre-dive
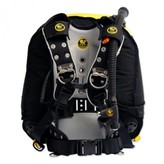
Check your BC inflator by connecting it to a regulator that’s hooked to a tank. Shoot a few bursts of air into the BC, then release the inflate button and listen for air leaking into the BC that would indicate a stuck inflator. A technician must repair any leaks before you get in the water. Next, inflate your BC until the pressure-relief valve pops off, and let the BC stand for about 20 minutes to see if it holds air pressure. While the BC is inflated, check the cummerbund, waist strap, shoulder straps, tank band and all the buckles for excessive wear. If your BC has metal buckles, check them for corrosion, which will weaken the metal structure and eventually cause the buckle to fail. A buildup of white chalky substance or green powder in addition to rust are indications of corrosion. Minor corrosion can generally be cleaned with a stiff brush and a little white vinegar—be sure to rinse the item afterward so the vinegar is thoroughly removed—and a quick spray of food-grade silicone will help to stop future corrosion if it is applied routinely after your equipment is clean and completely dry.
Post-dive
Rinse your BC in fresh, warm water. Take all the air out of your BC, place it in the bottom of the rinse tank, hold it down with your weights and let it soak for about 30 minutes. Then, drain the tank, rinse the equipment to remove most of the soap, refill the tank with fresh water and allow the equipment to soak a few more minutes to remove any soap residue. To rinse the inside, depress the manual-inflate button and hold the mouthpiece under running water until the BC is 60 to 70 percent full of water. Shake the BC to agitate the water and then drain it through each of the dump valves and the inflator hose. You should use each of the dumps, including the pull dump on the BC inflator hose, to remove salt crystals and sand from each of these important valves. Once you drain the water, fully inflate the BC, allow the remaining water residue in the BC to settle for a minute or two, and then drain it again. Finally, inflate the BC to about 50 percent of its volume and let it air-dry away from direct sunlight.
Tanks
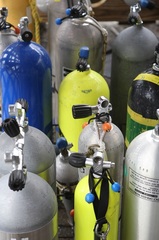
Scuba cylinders should be rinsed in fresh water after use, then wiped dry. Remove the tank boot and dry the cylinder completely so that no water is allowed to accumulate on the outside of the tank. The valve should be opened briefly to expel any moisture from the valve opening.
All compressed air cylinders should be inspected regularly. Before diving, check for any corrosion, dents or heavy wear on the outside of the tank. Visual inspection is required annually and more frequently if used heavily, filled in a humid environment, or if the tank is drained below 200 psi. Any stickers should be removed prior to a visual inspection. Tanks must be hydro-statically tested once every five years to ensure the integrity of the tank walls (Federal Law).
Before storing, be sure tanks are pressurized to at least 2oo psi to prevent any moisture from entering the cylinder. Store tanks securely and upright in a cool dry place with no chance of being knocked over.
Mask Care
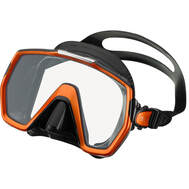
Here’s our guide to keeping your mask in great shape in 5 easy steps. Critical scuba diving gear requires annual inspection and service by a qualified technician, but you still need to care for your mask with each dive.
Predive
1. If you haven’t replaced your mask strap with a stretchy fabric one, stretch out the strap to look for fine cracks. If you do find any, immediately replace the strap.
2. Examine the silicone of your mask skirt. The most common failure area on a mask is the feather-edged seal on the skirt. This can become imperfect or irregular in shape with time and heavy use, and that irregularity can create leaks.
3. Check all the buckles, which can crack, split or become clogged with debris that can interfere with how they function. Then check the frame of your mask for cracking, chips or other obvious signs of wear, especially in the areas immediately adjacent to the glass lens.
Postdive
1. To avoid mildew growth, rinse your mask in warm, fresh water and allow it to drip dry completely before packing it away.
2. Pack the mask loosely, so nothing distorts the mask skirt. Leaving it squashed into a weird position for a long period of time will cause it to take on an unnatural shape.


